How to Create Hard Light with a Softbox
The softbox is one of the most popular tools for light shaping. Most of us use it to create a soft, even and flattering light, but what we often forget is that the softbox is a versatile tool that can also be used to create a harder light with sharper shadows. This article will take a closer look at its properties.
All images in this article were lit with just one softbox: the Profoto 3’ Octa RFi. The Octa RFi was standing in exactly the same place at exactly the same angle. But as you can see, the images are quite different. So, how did we do that?
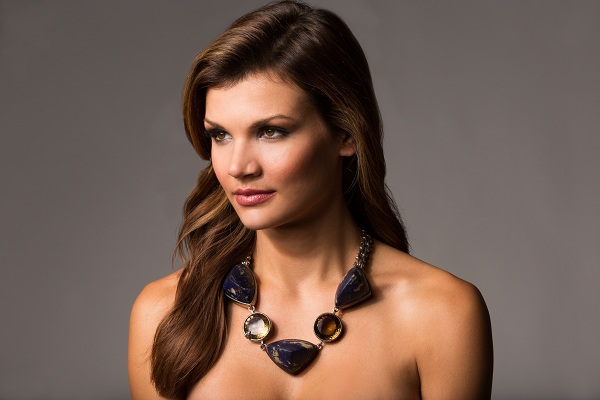
For the first image (1), we mounted a Softgrid onto our Octa RFi. The Softgrid reduces the light spread to 50° and creates a more directed light. As you can see, the light is just as soft and even as you would expect, but the amount of spill light that hits the wall behind our model is drastically reduced.

#1
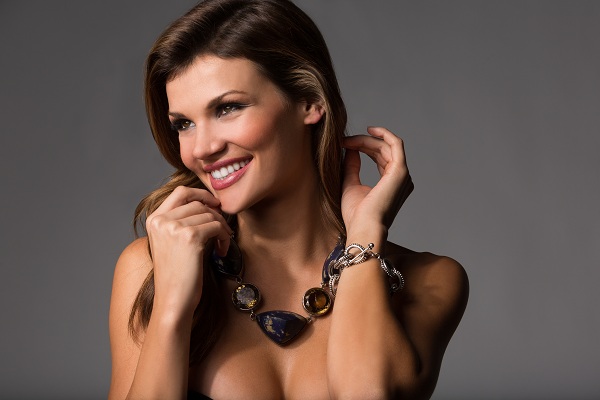
For the second image (2), we removed the Softgrid. This did not affect the quality of the light, it is just as soft and even, but the light spread is much wider. Compare our model in the first and the second image. She is lit almost exactly the same. The background, however, is now a lot brighter.

#2
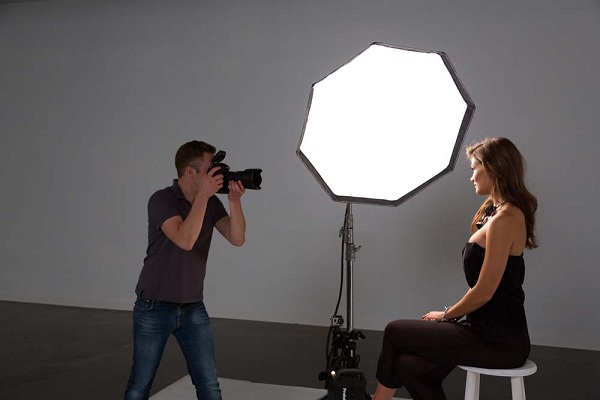
For the third image (3), we removed both internal diffusers – and this is where things get really interesting. Removing the diffusers essentially converts our octagonal softbox into a parabolic reflector. Now, the light is no longer wrapped around our model. Instead, it is focused and quite hard. Take a closer look at the sharper shadows under our model’s chin or around her necklace. Also, notice how the highlights are defined and how her features and skin texture are richer in contrast. This is not a light we typically associate with a softbox.
#3
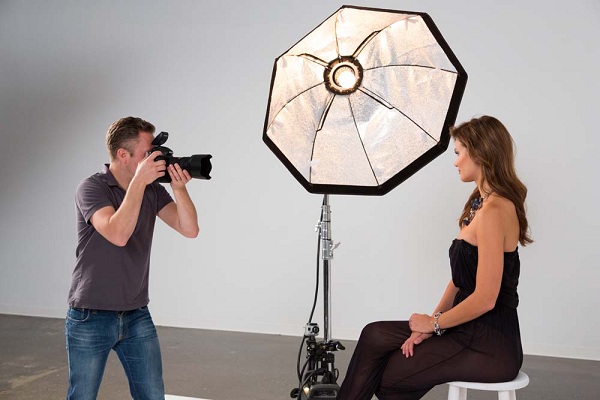
Finally, let us take a closer look at image (4). This was shot exactly the same way as the third image: no grid and no diffusers. Again, this is not your typical softbox light. This light is almost like sunlight or something you would use on a fashion shoot – focused, distinct and quite hard.
#4
In conclusion, we have created three different lights with just one softbox. Or, in other words, do not underestimate the softbox.
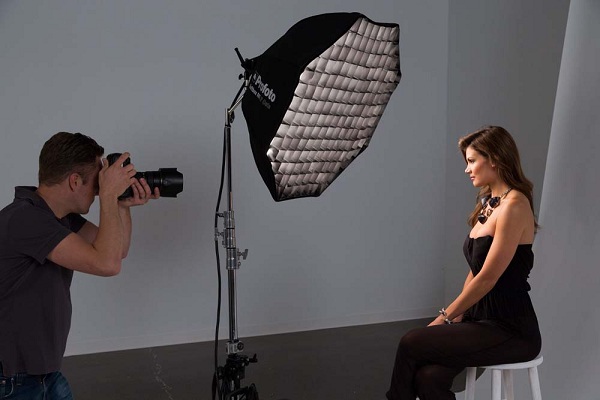
Here’s a behind the scenes look at the set-up:

Profoto
Profoto, The Light Shaping Company, is the world’s leading manufacturer of photography lighting systems. Since 1968, Profoto has been providing photographers with innovative tools to create and shape light. www.profoto.com/blog
Follow Me:


May 04, 2017 at 3:11 pm, Jose Castro said:
For all those oddly negative comments below, the principle of charity requires us to interpret the point of the article to demonstrate the relative “hardness” and “softness” of light from a softbox when one removes the diffusion and grid components. Yes, without the modifying elements the light increases in its “hard” qualities. Period. There are no absolutes about what is hard or soft light in general, only relative differences as noticed by how the shadow edge…the distance of transition from light to shadow, is increased or decreased by removing said elements in a softbox. Gees Wiz..
May 04, 2017 at 3:02 am, Rogier Bos fotograaf said:
Thank you for the article. You helped me understand I really should spend the extra money for the grid. They are an optional accessory I have often opted not to purchase because of the additional cost. Somehow I always regret not spending a little bit of extra cash…
May 05, 2017 at 2:55 am, Leslie Savage said:
There is so much wrong with this article I don’t know where to begin which is what a lot of these post are saying.
My advice would be to go out and try different light modifiers before you take the word of just anybody.
My personal favorite is shoot through umbrellas. I tried one at the studio I use to use, and I switched from reflective to shoot through. I am not saying you should do the same, but grids are used to direct light more than defuse it.
His “Softgrid” would work the same as a defuser stretchered over the soft box.
Notice the light is also reduced on the model as well as the background which means a shoot through umbrella could have done the same.
Be very careful of advice before you go out and spend your hard earned money on something that may not work as well as you were told.
I would also look into using speedlights over studio strobes, but use speedlights with guide numbers over 100 (my go to speedlight has a guide number of 192). Doing this will give you more versatility without spending money on both while getting the same results.
May 03, 2017 at 6:34 pm, SIGmund Fried said:
No model credit?
July 07, 2015 at 10:28 pm, Sakib said:
Hi buddy,
This is a short lighting caption not hard lighting.Your writing concept was good but there is some misunderstanding.
February 28, 2014 at 9:28 am, Neo Racer said:
Wow so many experts, and yet…
June 13, 2013 at 11:36 pm, canoncameraphotography Canon said:
Migel, that shadow under her chin is because the light could not wrap underneath her chin not because of “hard lighting”… I may give one image there hard lighting if you look very closely at her nose it might be considered hard lighting where that touch of hard shadow is shown as a result of lighting but NOT shadows that are hidden behind or under her chin – Typically, hard lighting is based on the shadows created around the nose area and can be identified by the clear and sharp edge that would tend itself to being able to be drawn with a pen (not a faded edges) like we see below her nose.
I enlarged the image and would be hard pressed to think of those shadows by her nose as hard lighting … I would give it an “F” if this was a pass fail assignment.
This could have been done more professionally and demonstrated a true hard shadow by the model’s nose…
That is stretching to talk about a shadow that was created by her neck being physically blocked by her chin as hard lighting example he was trying to show…
Besides, those neck shadows have a transition in them and are not sharp and do not go from “light to dark” as hard lighting is typically considered to show / do.
May 04, 2017 at 6:00 am, Dreyfusss said:
‘because the light could not wrap underneath her chin’
There’s so much rubbish written in tech articles; as yet, unless you pass the light through a prism or medium other than air, you CANNOT change its course. Light travels in straight lines. Fact. Maybe diffuse light bounces around a bit and you have it coming from multiple directions, but light doesn’t wrap. Sorry.
May 04, 2017 at 10:22 am, Brian_Bray said:
Of course when we say light wraps, we don’t mean it literally. It would be more accurate to say “appears to wrap”, but that gets shortened to “wraps”. Bottom line is we see a gradient instead of a hard edge.
June 12, 2013 at 6:03 am, MiGel said:
Really guys, in this case I don’t get the critique. And I’m pretty experienced with lighting and technique.
“Hard light comes from point sources (small) at a significant distance.
Studio light sources at this proximity do not create or lend themselves
to hard light.”
This is NOT entirely true. First of all there is no “hard light” or “soft light” in absolute terms. There is only harder or softer light.
Second, the hardness of light is determined by one thing only: relative size to the lit object.
DISTANCE only changes that relative size towards the object.
DIFFUSION as well doesn’t change hardness DIRECTLY, but it makes the light source appear bigger / more even in it’s size (plus the diffusion makes it more likely that things in the surrounding reflect the light and make the source virtually larger by this as well).
If it is not that even you get, like in the example (look at the chin shadows!), a hotspot (which is a brighter & harder part of the light) and some fill light. The hotspot comes from the relatively small source of the flash bulb, the fill from the reflected light in the silver outings of the SoBo.
So you DO get a harder light (plus fill) without the baffles and diffusors as the whole lightsource is no longer a big, even lightsource but a small lightsource with some reflection around it.
June 12, 2013 at 6:08 am, MiGel said:
P.S.:
Matt Francis
wrote:
“The hardness of light is determined by the apparent size of the source compared to the subject.”
– This is correct and in shorter words what I just wrote.
“The only way to make the light harder would be to move the softbox farther away from the subject.”
– This is clearly wrong. You can also change the light by using light modifiers. That’s why they are called like that. By removing the diffusors you transform the softbox into an other modifier. (as I described)
June 11, 2013 at 7:50 pm, Duck Feeney said:
That’s not hard light. Maybe it’s time to fire the person who writes your captions. 😛
June 11, 2013 at 7:40 pm, OllyOlly OxenFree said:
For all those being negative, I think the intent was to illustrate how the changes in the softbox modifiers increase contrast. Until I read differently, I used to think “hard light” meant the same bright, strong light the model in the images has on her cheeks, coupled with the dark shadows that give strong contrast. The guy took the time to put something together to show what he’s learned, and how it might help others, and for that I say kudos. Keep ’em coming!
June 11, 2013 at 4:43 pm, Jared Ribic said:
Nice! I’m going to try it with no diffusers, just the grid.
May 04, 2017 at 5:52 am, Johny Willemyns said:
You might just as well use a big umbrella and put it as fa away as possible from the subject…
June 11, 2013 at 3:21 pm, Guest said:
correction on my grammer — I was stating this is NOT hard lighting and hard lighting can be determined by the sharp edges of the shadows.
This mostly appears to be short lighting…
June 11, 2013 at 2:54 pm, Matt Francis said:
The hardness of light is determined by the apparent size of the source compared to the subject. The only way to make the light harder would be to move the softbox farther away from the subject. Who wrote this article??
June 11, 2013 at 2:40 pm, tom upton said:
Congratulations you know how to un hook and re hook the internal baffles of a Profoto dome. This is not hard light. It is studio strobe modified and not modified. Hard light comes from point sources (small) at a significant distance. Studio light sources at this proximity do not create or lend themselves to hard light. Who wants hard light on this nice ladies face anyway? What would be helpful is to suggest when the harder or softer look is relevant to the shot. Adjusting these internal modifiers in an environmental portrait on location can help emulate the light you are in. This can help you light the person in a way where your added strobe lighting makes sense (or does not compete) with the existing light, pulls of the shot and your subject looks great. The lighting does not call attention to itself. That is the Pro part of profoto.
May 05, 2017 at 3:04 am, Leslie Savage said:
Well said.
June 11, 2013 at 1:59 pm, Guest said:
This is my second comment as someone deleted my first.
This is NOT hard lighting and you need to educate yourself before posting such misinformation.
This NOT hard lighting.
With me showing this “education” post as an error then I should win the soft boxes you are giving away.
June 17, 2013 at 4:43 pm, Guest said:
I’m very confused…
The sequence / descriptions of the 4 different resulting Portrait examples, does not match the sequence of the 4 “Behind the Scenes” light box examples.
And there is no explaination of what was done different in the #4 Portrait and Light Box examples, compared to the #3s. You say nothing was changed. But then, in light box example #4 you go back to adding the diffusers!!! So the setup was changed. And the model’s face was turned.
I appreciate the attempt to show us the lighting differences, but you did not write the explainations properly and proof read, and the corresponding pictures are out of sequence.