How to shoot a bridal wear collection in an old theater
Dealing with the challenges of shooting on location with only the lighting available in a theater, adjusting for the color temperature of theater lighting, and a step–by-step guide for post-production on the image. A great day’s shoot.
Photographer: Bruce Smith
The shot
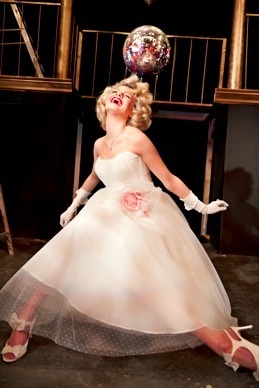
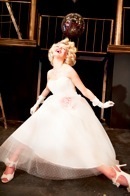
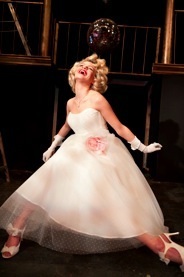
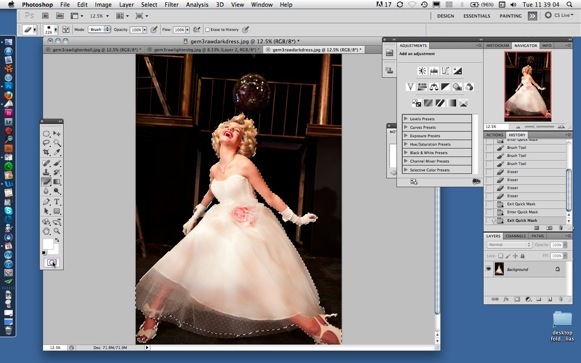
The image to the left is one of twelve wedding gowns I shot in an old theater for one of my many couture bridal wear clients.
The storyline for the collection was theatrical drama, like show girls on stage and backstage in the theater. So I chose my models very carefully to suit the story. Casting the right models to fit the story of the shoot is very important. Get this part of the project wrong and your story will not be believable.
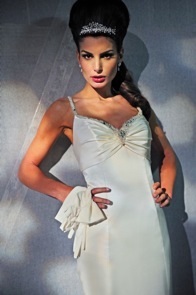
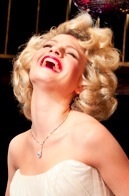
I chose Chloe Jasmine Whitchello (model in image above), who already is a very theatrical person. Her just being herself would definitely make this story work. As an opposite character to Chloe in some ways, but very statuesque and with a striking classical look, I cast Simona (in image bellow) as my second model. These two very distinctive looks meant getting great variety and drama into the shoot.
The location
The location had to lend itself to the theatrical, dramatic story, so we chose the Cheltenham Theatre. I didn’t have time to get to the theater to recon the location, so I was sort of blind as to what to expect. But like most of us, I have been to the theater and could imagine what I might find there. I’ve had the opportunity to be backstage a several theatrical shows, so I could guess at the set up we’d be shooting in.
A few days before we planned the shoot, I asked my client (who lives very close to the theater) to take a look around and snap some pictures of the space. I loved it, so we agreed it would be a fabulous location to shoot.

The lighting
I wanted to light the pictures with the stage lighting, to give the images a realistic theatrical feel. I’m not familiar with how to operate the very complex lighting rigs in theaters, so I made sure the theater lighting engineer would be there working with us all day.
With all of the spotlights and flood lights controlled from a massive, very complicated control board, it was essential to have the lighting controlled by the lighting engineer. He and I coordinated, switching lights on and off and positioning each light until I thought it was sort of right for the first area I would be working in.
When my model was on set I could alter her position and ask the lighting guy to shift a spotlight a little or a lot, so the lighting was just perfect.
The set up
While my models, Chloe and Simona, got their hair and makeup done, and were dressing in the first beautiful gowns, I got on with setting up the camera kit and computer with my assistant, and put my mind to where I would be shooting and how I would be lighting each area I would use as a backdrop.
On the main shot featured here I had floodlights to back light and a spotlight as the main key light coming from high up on the left side of the theater, focused on Chloe as though she were performing center stage. More floodlights picked out detail in the darker areas of the stage, because everything backstage was painted matte black, so it eats up light.
There were hundreds of tungsten lights of every size kicking around the stage, as well as up on rigs above the stage and all around the theater itself, with big, powerful spotlights at the back and on each side of the theater, so I was never going to be short of a light to pop into a corner here or there.
All the theater lighting is tungsten, very warm in comparison to daylight or flash, so the first thing to do was set my white balance to incandescent or tungsten and take some test shots around the area. The spotlights gave me good readings in all areas I wanted to shoot. I metered to see if I could shoot at a respectable shutter speed shooting hand held, i.e. 1/250 at F2.8 to F5.6, without increasing the ISO beyond 800. Because I was shooting on a full frame sensor Nikon D3, I wasn’t worried about noise, even shooting at ISO 800.
Post-production
Below are the various steps I did in Photoshop to make the image as I envisaged when I shot it.

Assessing the un-retouched image
There are four adjustments I want to make to the image to improve it.
- Darken the gown to show more of the detail in the fabric
- Lighten the background to increase separation
- Lighten the disco ball
- Lighten Chloe’s face
As a quick way to do all that, I duplicated the image three times, the first one to darken the dress, the second to lighten up the background, the third lighten the disco ball. The lightening up of Chloe’s face I’ll do on the darkened image of the gown.
Darkened dress
Lightened ball
Lightened b/g
Lightened face
Darkening just the dress
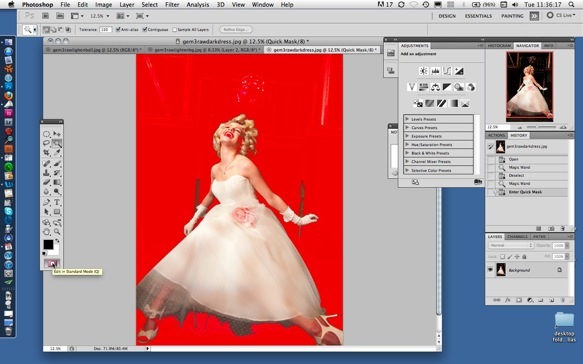
Using the magic wand to select areas
With the magic wand set at a tolerance of 150, I clicked on the mid-tone areas on the gown. You can add to this selection by holding down the caps key and clicking on areas of the gown not selected. Repeat this until all of the areas to be selected are done.
See the screen grab bellow showing the areas that have been selected using the magic wand.
The next step shows how to refine the selection using the mask mode, the eraser and paint brushes.

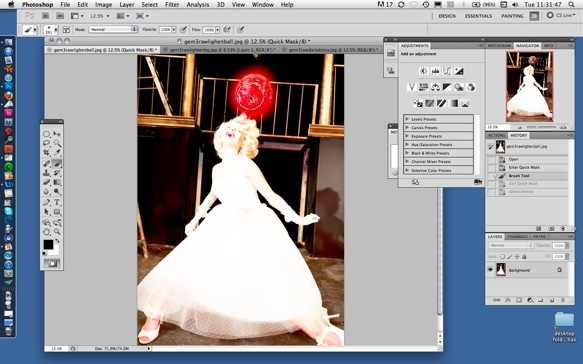
Creating a mask
Click on the mask mode to highlight what’s selected and not selected. See screen grab bellow. The areas that are red are protected. There are other areas that I want protected plus areas that don’t. To resolve this I used the paint brush to paint in and the eraser brush to erase parts of the mask. Please see the post-production on Little Gems 2 on adjusting brush size and softness. The selection made can be inverted to work in reverse.
Disguising the selection
Below is a screen grab showing the completed mask. In order to not have hard edges to the selection, I need to feather the selection by just enough to disguise the edges of the selected areas.

Feathering the edges of the selected areas
Click off the mask mode to see the new selection. See screen gab bellow. Click select, modify, feather and type in the amount to feather by. This amount will vary depending on the size of the area selected. For this image I chose a feathering amount of 50, enough to soften the edges but not be detected when I montage the images together.
Darkening the gown using curves
Now that I have a good selection and have softened the edges, it’s time to adjust just the gown areas of the image using curves. Select image adjust, curves, and pull the middle of the curve down slightly, until the dress is looking better, showing more texture and highlight detail. When done, the selected adjusted areas of the image can be moved onto the duped image I used to lighten up the background.
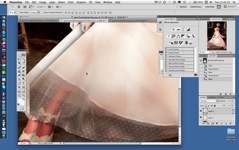
Creating a layered image
Select the move tool and click on the selected area of the image. Holding the mouse click on, the selected area can now be moved onto the duped image and positioned in register, hiding the lightened gown areas of the image underneath. See screen grab bellow. At this point, I enlarged the image on my screen to see clearly that the selected area of the image is placed exactly in register.

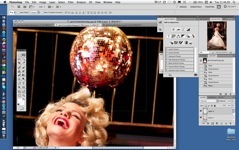
Selecting the disco ball
On the already lightened dupe for the disco ball, I can make a selection using a paint brush in mask. Click on the mask mode and chose the paint brush. Set it to more or less the same size as the disco ball, softened to 50.
I roughly painted a mask over the disco ball. This doesn’t need to be an accurate selection, due to its dark background and the dark background of the image I will be moving it to.
Lighten selected area
When I finished painting the mask over the ball, I switched off the mask mode to reveal a selection around the disco ball. I inverted the selection and then in curves I lightened it even more and added some sparkle to it by sharpening it by 50.

Now I’m ready to move the disco ball onto the lightened background image that I moved the dress to in the previous step. See screen grabs bellow. Make sure it’s in register.

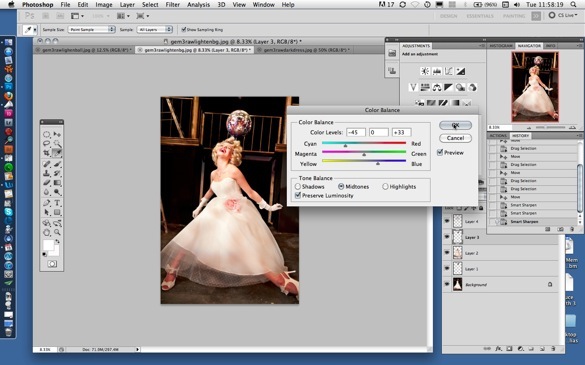
Minor color adjustment of selection
I made the ball look more mirror-like by adding some blue and cyan. Use image adjust, color balance, add some cyan and add some blue. See screen grab bellow.
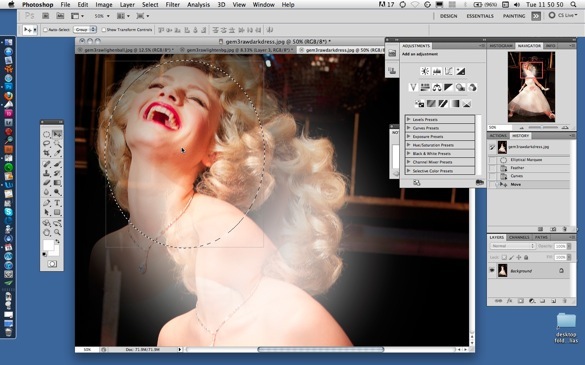
Selecting area of face
On the duped image for the darkened dress, using the round select tool, I selected the area, including hair and neck, and then feathered by 200.

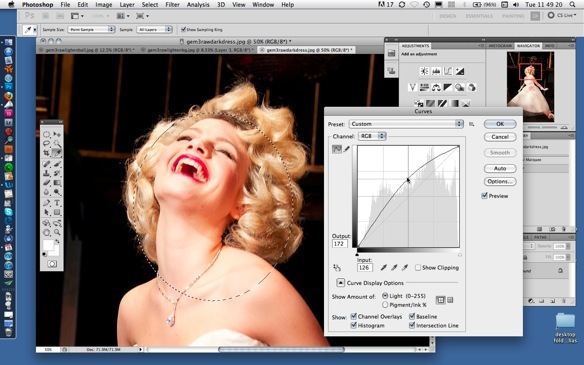
Lightening up the face using curves
Once the selected area has been feathered, it’s ready to lighten up using image, adjust, curves. See screen grab bellow. Always use these adjustments subtly.
Move selection
The selection is now ready to be moved onto the lightened background image. See previous steps on how to move a selection to another image. Make sure the selection is positioned in register.
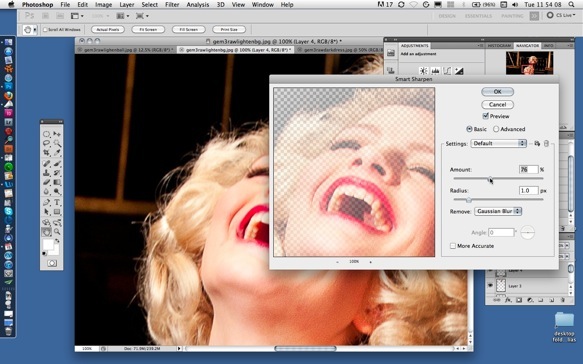
Adding some sharpening
Once the face selection was moved and accurately placed on the lightened background image, I added some sharpening.
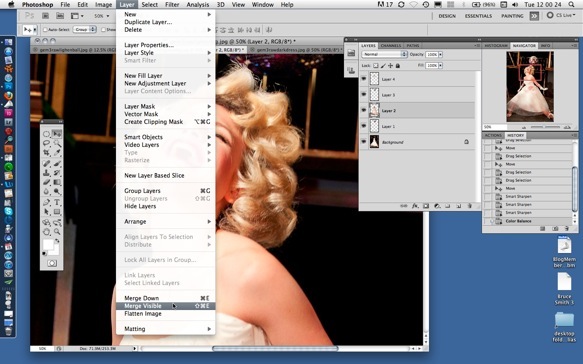
Merging layers
Merge the visible layers. Make any minor changes to any of the selected areas that will now be showing as layers on the lightened background dupe image.
The finished image
Save as a tiff and select for IBM as in previous articles.

Photographer: Bruce Smith
Bruce Smith
Bruce Smith is a world-class fashion and beauty photographer whose work has appeared around the globe for more than thirty years. He's the author of "Fashion Photography: A Complete Guide to the Tools and Techniques of the Trade" and teaches workshops internationally. His website is www.brucesmithphotographer.com.
Follow Me:


January 16, 2013 at 10:22 am, mosimon said:
Bruce…this shoot was & still is an experience I will never forget. Thank you for letting me be part of it! Until next time!
Mo
December 28, 2012 at 9:28 pm, Curtis said:
Fantastic images again!
December 30, 2012 at 4:14 am, Bruce Smith said:
Many thanks Curtis 😉
December 19, 2012 at 1:14 pm, FBY1K said:
Thanks for another informative post Bruce. There are many shooters that never work with continuous lights. Flash is an excellent source for producing light, but you showed what can be done with available lights, planning, and a great team.
December 28, 2012 at 2:10 am, Bruce Smith said:
Thank you for your comment. Glad you found it useful.
Best regards
Bruce