Behind the Scenes: Cutting Light
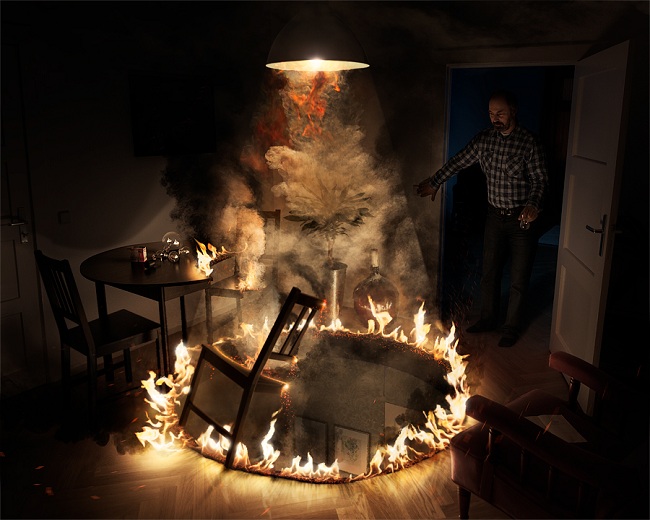
This is a photo I’ve worked with for a few months. I’ve never really worked with fire, so I saw it as an experiment, but the idea was to let the lamp beam cut through basically anything that would come in its way.
Photographer: Erik Johansson
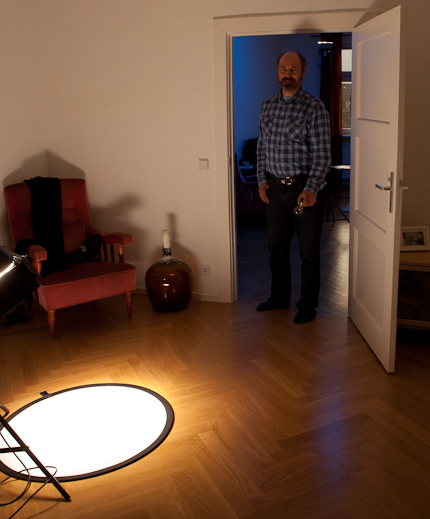
I knew that I had to build it up piece by piece because it would be quite hard to shoot the fire at the apartment.
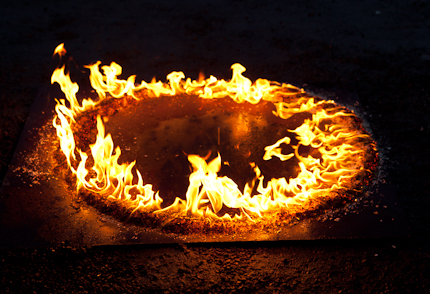
I shot a fire ring made up of lighter fuel and sawdust outside in a controlled environment.
I shot the smoke separately to be able to put it where I wanted.

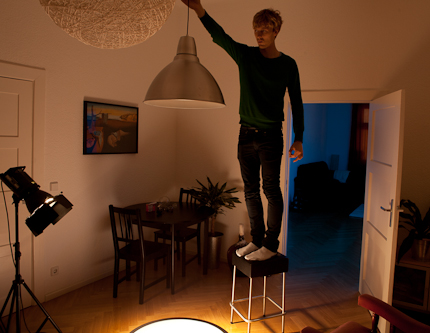
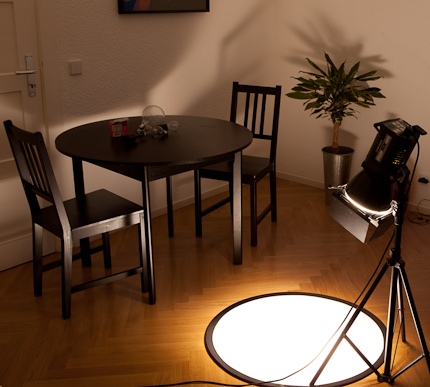
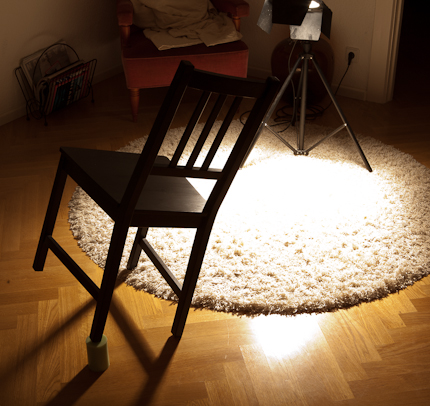
I then shot the empty room and the model to have something to start with. All lit from below with the fire in mind as a light source.

To make sure I got the cut of the light beam right I made a simple 3D model of the space in Google SketchUp. I don’t normally use 3D software in my work, but using photo match in SketchUp is a great way to see where an object should be placed in a 3-dimentional space.

Here are 100 % crops of the different parts of the photo:

I would be happy to hear your thoughts or ideas about the photo or process.
Erik Johansson
Erik Johansson is a full time photographer and retoucher from Sweden based in Berlin, Germany. He works on both personal and commissioned projects, and sometimes creates street illusions. For more information please check out www.erikjohanssonphoto.com and his TED talk.
Follow Me:


May 18, 2016 at 10:05 am, sillee said:
tank you , been planning on shooting my own fire compilation, didn’t even think about compositing though, thought I’d use stuntmen/ women …
May 18, 2016 at 9:42 am, Sal G said:
I always look for ways to get learn and be inspired so thank-you Erik Johansson – thanks for sharing.
March 13, 2013 at 1:56 am, joebphotography said:
I realize now what a lazy photographer I am. That is so much work to put in for a single shot. But I am very impressed with what you were able to accomplish
March 12, 2013 at 10:32 am, Michael said:
Great concept. and well executed but not quite there. I would try to make the smoke look more local to the edges of light. The reason i say that is because what I see is the model just hitting the light switch meaning (to me at least) that this was instantaneous. As soon as he hit the switch POOF! The smoke wouldn’t have traveled that far OR the chair would have fallen in the hole.
The other thing I would work a little is the light beam. i’m not sure which technique are using but soften the edges a bit. Light falls off it doesn’t just stop. Even the best controlled light that is not a laser has falloff.
Soften the edge of the light, make the smoke seem as though it just went POOF! and you have a damn near perfect composite.
March 01, 2013 at 6:11 pm, R.P. Getz said:
Wonderful work here! I love it! Love seeing your process aswell! 😀
February 27, 2013 at 7:06 pm, maurocattelan said:
Hi Erik, the idea is very good, you realise that you need some important details to render the truth…the only thing, if I can underline, is the smoke…there should be more fog, or used it in another way, to give the sense of dangerous and reality, just to give more emotions otherwise the spectator realise that scene is not true, you are not involved into although you say “Oh, that’s good!”….. hope it can help you 🙂
February 27, 2013 at 1:59 pm, LTS Photo said:
The only thing I can find to suggest would have been asking for a little more expression from the male model. Either sinister “Take THAT you stupid floor!!!” or shocked “OHHH @#$@! my light is burning through the floor!”